Hello everyone, hope you’re having a blast with our #TexeiAdventCalendar articles. This article follows the one written by Maher Ajamane a few days ago about custom notifications, to present how to send one using Apex in the Winter 21′ release. I hope you had a great time yesterday with Jorge Centeno’s article, in case you missed it, you can find it here to see how to analyse your Lightning pages performances.

What are custom notifications?
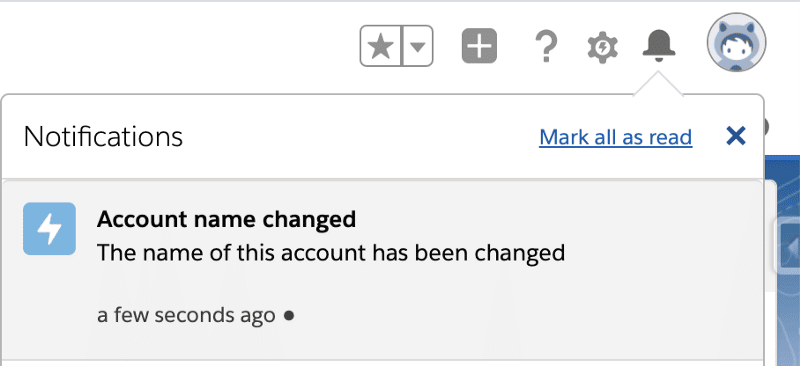
Custom notifications are a way to convey information inside Salesforce by sending notifications to users with a short message (that can be linked to a record) which can be accessed in the small bell on the top right corner of the interface.
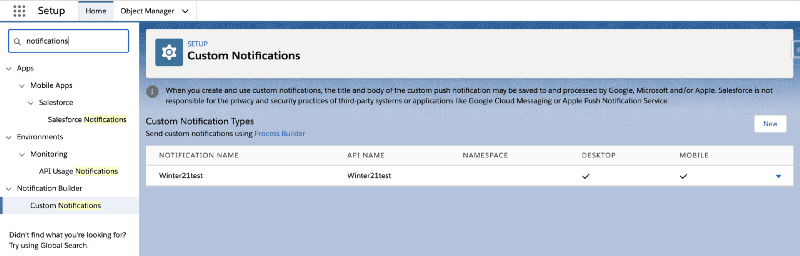
To send a custom notification, you first need to define a custom notification type in the setup (in Notification Builder -> Custom Notifications).
Then, the custom notifications can be sent using the defined type. Custom notifications can be sent using Process builder, Flows or APIs. Maher Ajamane made a great article about the way to send custom notifications in this very same #TexeiAdventCalendar, that you can find here. Winter 21′ release came with a new way to send notifications in Apex. Let’s see how it goes.
How to send custom notifications using Apex?
Let’s consider, for the sake of a use case, that you want to be notified whenever one of your account’s name has been changed (#dontmesswithmydata). It can be set in a trigger, and after checking that the Name has indeed been modified. We can set the code to send the notification. You would first need to set up the Custom notification type as explained before, then you’re good to go.
Here is an example of how it could work, based on the documentation.
// Get the Id for our custom notification type
CustomNotificationType notificationType = [SELECT Id, DeveloperName
                                        FROM CustomNotificationType
                                WHERE DeveloperName='Winter21test'];

// Create a new custom notification
Messaging.CustomNotification n = new Messaging.CustomNotification();

// Set the contents for the notification
notification.setTitle('Account name changed');
notification.setBody('The name of this account has been changed');

// Set the notification type and target
notification.setNotificationTypeId(notificationType.Id);
notification.setTargetId(acc.Id);

Set<String> addressee = new Set<String>();
addressee.add(acc.OwnerId);

// Actually send the notification
try {
    notification.send(addressee);
}
catch (Exception e) {
    System.debug('Problem sending notification: ' + e.getMessage());
}
The first part aims to retrieve the custom notification type associated with the notification. Then, we use the new class CustomNotification to create our notification, that we then fill with the appropriate title, body, and target (this last allows redirection to a record when one click on the notification). Finally, the method send() takes in parameter a set of user ids to which the notification will be sent. Now if we try to change an account name, its owner will get the following in the top right corner:
This new feature allows a more flexible use of custom notifications, that you can send directly in trigger methods. But also in LWC controllers, for instance, which leaves only your imagination as a limit !
That’s it for the new custom notifications class. Hope you had a good read, and come back tomorrow for a new article written by Fabien Huot.
Follow us on LinkedIn here and on Twitter here. Have a great day!