When it comes to managing your data in Salesforce, there is a lot of content everywhere. How to design your data model, how to assess and manage your data quality, how to turn your data into powerful reports and dashboards, how to leverage ETL tools… And so on. Today, I want to focus on how to simplify data manipulation on a daily basis.
Why? Because Salesforce consultants, administrators and sometimes key users manipulate sets of records everyday.
And let’s be honest, even with the best team organization, ETL tool and processes — which are never a given — whether you are a young Padawan or a Salesforce Jedi, we have all made a mistake one day or forgotten fundamental rules in our haste. And rolling-back can be very hard…
So, here is a list of basic tips that I find are essential when manipulating data in Salesforce on a daily basis. Yes, sure, some of you will tell me that most of it is just common sense. But it never hurts to repeat them, does-it?
Data manipulation: structural tips
Simplify your life with custom activation
Anytime, for any reason and any user, you want to be able to bypass the rules and processes in place. For example, you have to update opportunities but you don’t want to enforce Validation Rules and you don’t want the Triggers nor the Process Builders to run.
Well, there are several ways you can use to gain flexibility but I definitely recommend using Custom Permissions as a best practice.
- They can be assigned via a Profile or a Permission Set
- They can be referenced in Validation Rules, Workflow Rules, Process Builders, Flows, Apex Code.
- Contrary to Hierarchy Custom Settings they are metadata and not data. “So what?”, will you ask. Well, it means that Custom Permissions will be easier to manage in unit tests. Custom Settings need to be populated in your tests whereas Custom Permissions don’t. This is why Custom Settings are only, in my opinion, second best option.
Let’s see an example with Validation Rules.

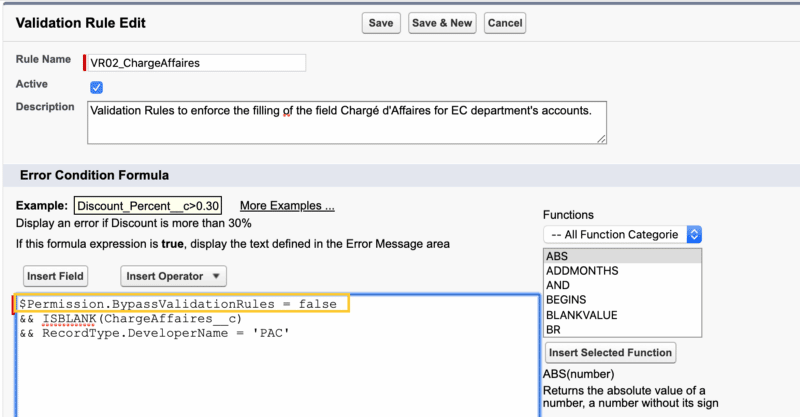
Now, don’t forget to assign your Custom Permission to a profile or a Permission Set and all the users with this profile or permission set will ignore this Validation Rule.
Another quick example, with Process Builder.
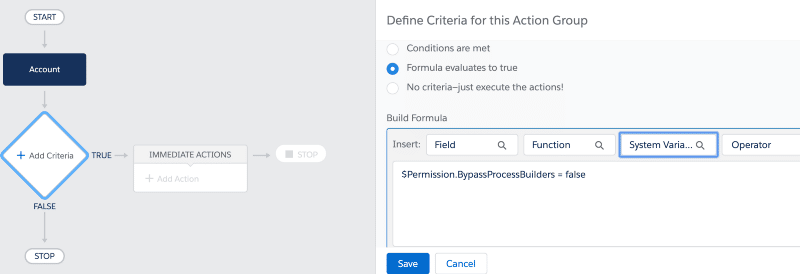
Note : you’ll find your custom permissions in the formula editor by clicking on the third lookup : System Variable.
Depending on your needs, you can even choose a finer granularity, at Object scale and define permissions such as BypassAccountTrigger or BypassOpportunityWorkflowRules for example.
Still need more convincing? You can read the article of my co-worker Mathieu Demuynck on the subject here.
Use External Ids
Yes, please. They are essential for data integration or migration.
- They help you prevent duplicate records from being created
- Of course they help identifying records with external systems, but also simplify populating and maintaining data in your sandboxes.
- They are great when you need to import related records.
Define and enforce a naming convention
Naming conventions should be defined as early a possible in a project and followed 100% of the time. They involve all metadata (Apex classes, Workflow Rules, Validation Rules…) and data (record naming).
Beyond representing a real gain in productivity for everyone, they’re also key to preventing, among others, fields and records duplication, coding and reporting problems.
Here are two articles on the subject :
Daily tips
Always think about data
Rule 101. Whenever you have to do something in your organization, ask yourself : when deploying to production, will you have to import or modify data? Will you have to bypass any existing rule or process? If you do, how do you plan to do it?
Are there external systems impacted?
It’s quite easy, when in a hurry, to forget about this one. But depending on the type of integration (synchronous or asynchronous), the robustness and the potential API limits of the external system, this could have quite an impact.
Back-up your data
In an ideal world, there should always be a back-up data system. In real life, it’s very often not the case. So before manipulating any set of records, make sure to save a copy of them in case you need to roll-back.
Test
Before mass updating any set of records, you should always try updating only one at first. This tip is particularly important if you trigger any process with you operation, to confirm the expected behavior and check there’s nothing you’ve overlooked.
Use Upsert
Here is where our External Ids are useful! The Upsert operation lets you match an External Id against what exists in our Salesforce database.
- If there’s a match, the existing record will be updated
- If there is no match, a record will be created with this External Id
- If there is more than one match, an error will be thrown
Upsert should be used whenever possible, it is a great way to identify potential duplicates.
Change field type… or don’t!
We have all been asked to change a field type. Beyond the potential data loss (link to Salesforce doc), it can be such a pain, especially when it comes to deploying, if this field is referenced elsewhere, i.e. in some code.
So, what I like doing is… not changing it! If there’s no good reason against it — for example the field is referenced and used in an external system — I’d rather :
- create a new field altogether
- reference it wherever needed
- deploy
- migrate data in this new field
- keep the old field for a couple days, to be able to revert easily if needed
This good old .csv or .xls file
We always have to deal with them at some point. So just don’t forget these safety checks :
- dates formatting, especially if the language of your Office Suite differs from Salesforce
- if you have data with a leading 0, such as phone numbers, Excel probably magically made them disappear…
- depending on your locale, be careful with “,” and “.” in your numbers or currencies
It’s not an exhaustive list, if you want you can see more here. But they’re definitely the most frequent source of errors.
Bonus : Salesforce Inspector, my love
This last tip is 100% subjective. I’m in love with the Salesforce Inspector extension! It is by far my favorite tool, it goes way beyond data management, and it’s free!
You can easily access it directly through the force.com side menu.
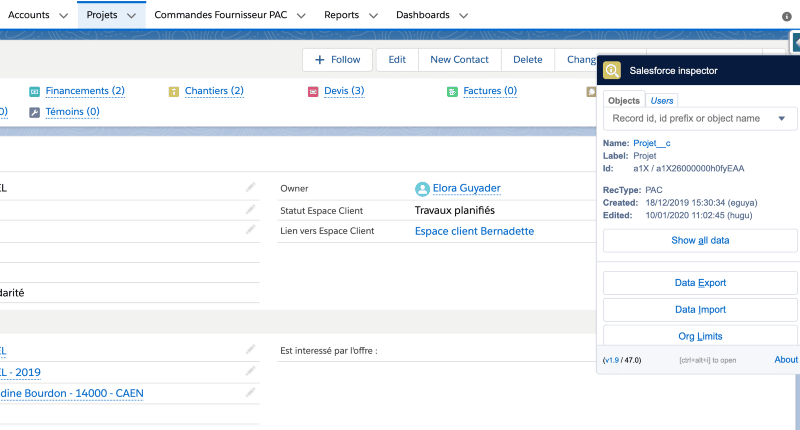
It basically makes coffee for you! You can :
- Show a field metadata (in Classic only)
- Show all data of a record… and more! From there you can edit, clone or delete the record, and even edit the page layout or access Object setup.
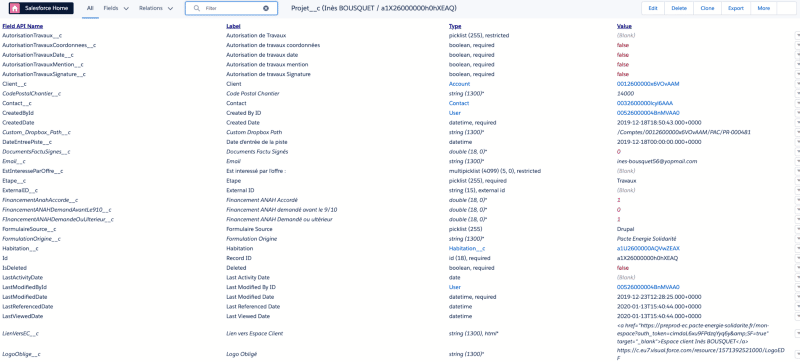
- Export Data using SOQL queries in excel, csv or json. And the perks include field autocompletion, picklist value autocompletion (very useful in a where clause), query history and query saving… I mean, such a gain of time!

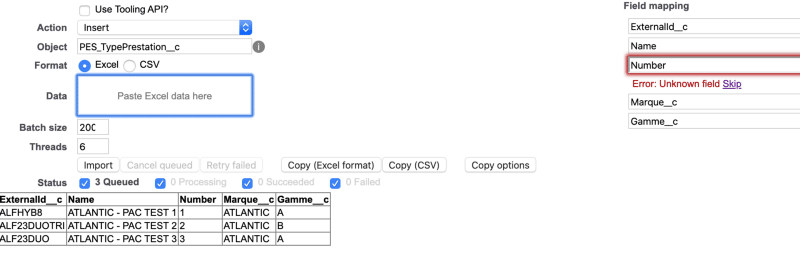
- Import Data by pasting directly excel or csv data. There is of course an automatic field mapping.
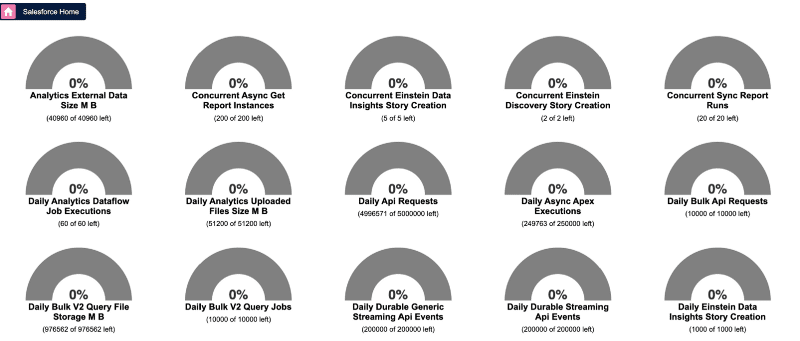
- See your organization limits
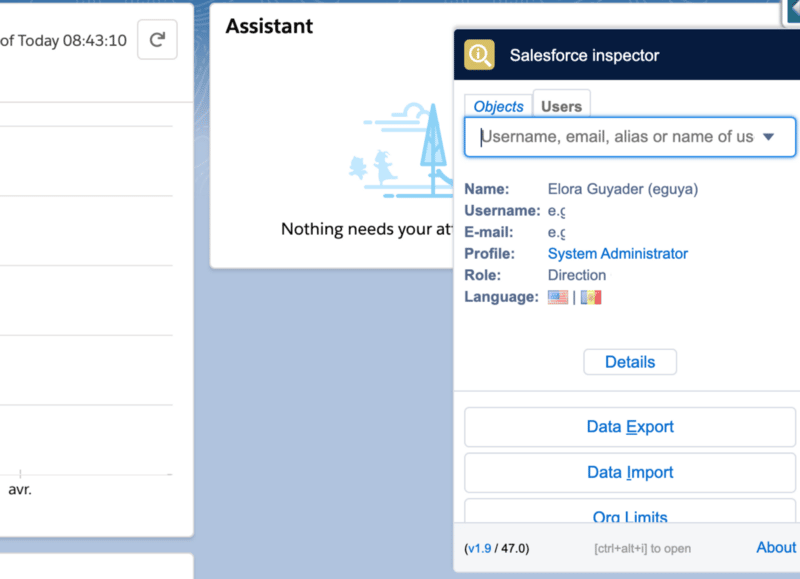
- Search for users, get their basic information and use the login as feature
- Download Metadata as XML files
- Explore API
Note : it’s a tool for daily use. So, when you need to perform operations on millions of records, you should turn to a more appropriate solution.
That’s all about data manipulation in Salesforce, if you want to continue learning, check out our article Uncovering Salesforce Settings: A Step-by-Step Guide for Scratch Orgs, and follow us on Linkedin!


