At Texeï, we have recently been through Lightning Sync for Gmail to activate this Spring’ 17 fresh new feature for one of our client… and it wasn’t as easy as it seems…
Despite an official documentation was released by Salesforce to help us handle the technical part of the configuration, it can still remains complicated for those of us who aren’t familiar with Google admin consoles and APIs.
We hope that the following step by step tutorial will enable Salesforce Admins to save time configuring this new awesome feature.
Before we start, you’ll need to open 3 different tabs in your favorite browser :
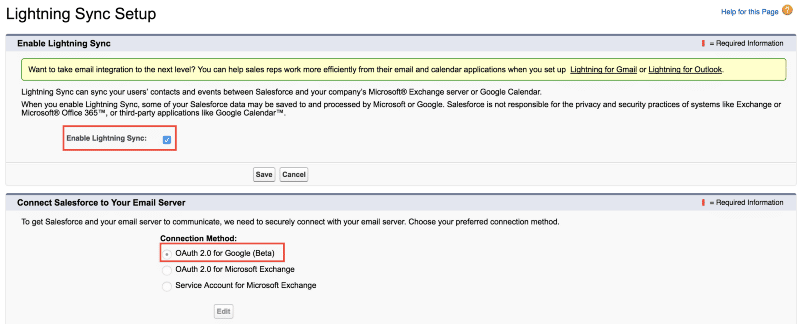
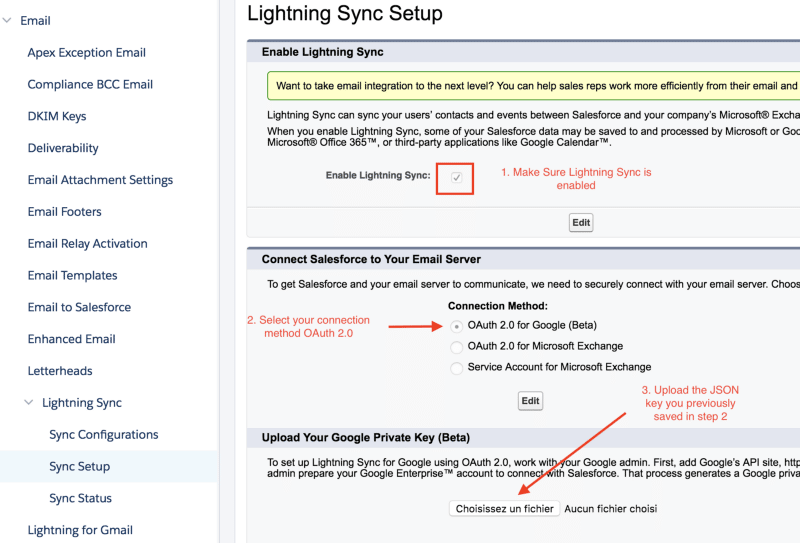
- Once logged in into your Salesforce org, navigate to Setup / Email / Lightning Sync / Sync Setup
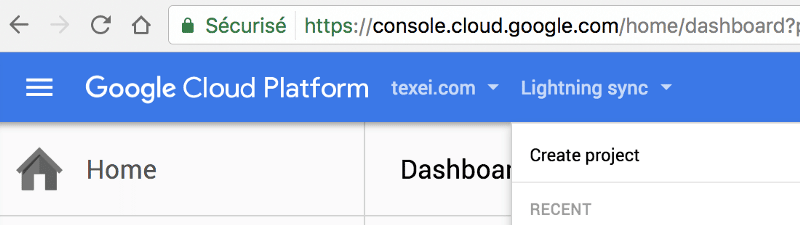
- As your company use Google for work to manage emails, go to https://console.cloud.google.com/ also known as Google Cloud Platform and be sure to login with your admin credentials (the ones you use to manage your company email service)
- You’ll also need to configure (as an admin) your google for work console which can be found at this URL: https://admin.google.com/your_google_domain/
Now that you’re ready let’s go through the technical stuff :
1. From the Salesforce setup page
Make sure to enable Lightning Sync and choose your connection method: OAuth 2.0 for Google.
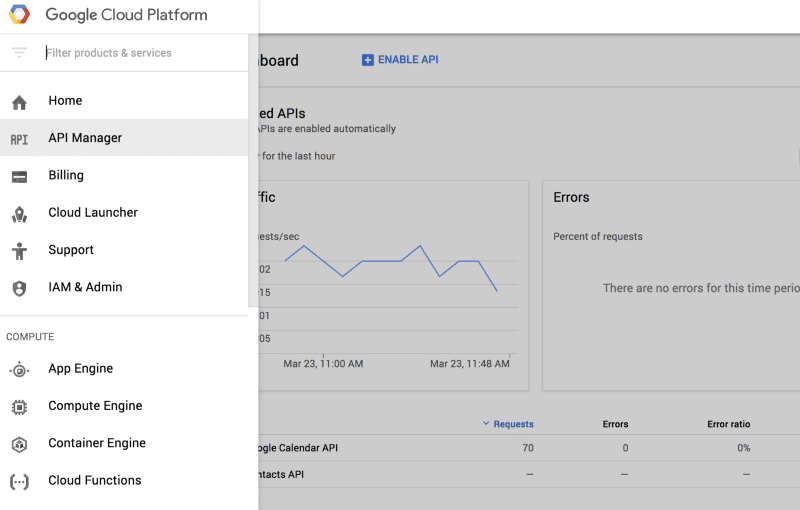
2. From your google cloud platform console
Navigate to API Manager with the hamburger menu
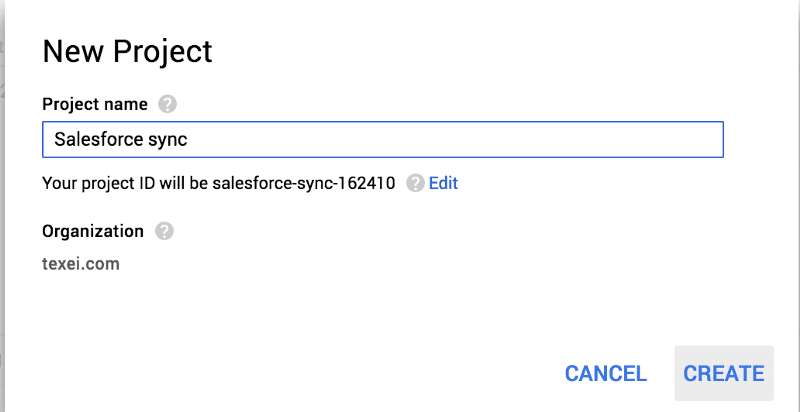
Create a new project within your google domain
It can be easily done from the menu top bar.
Creation of a new project takes a couple of seconds in order to be provisioned
Now that you’re in your new project, under the top bar menu, click Enable API and search for Calendar in the search box.
Choose Google Calendar API and click enable
https://giphy.com/gifs/3o7btOHeTCtWd7b3uU/html5
Back to the project, repeat the same operation to enable the Contact API.
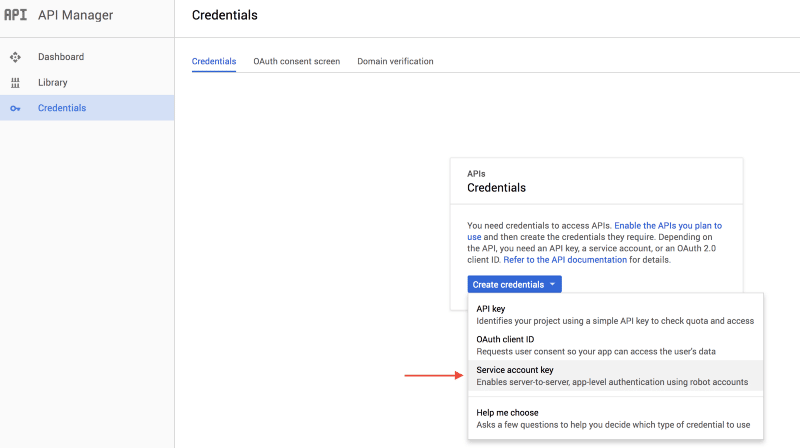
Once these two API activated, we need to create credentials from the project main page. Navigate to credentials from the left menu.
Click Create Credentials and choose Service Account Key from the top-down menu
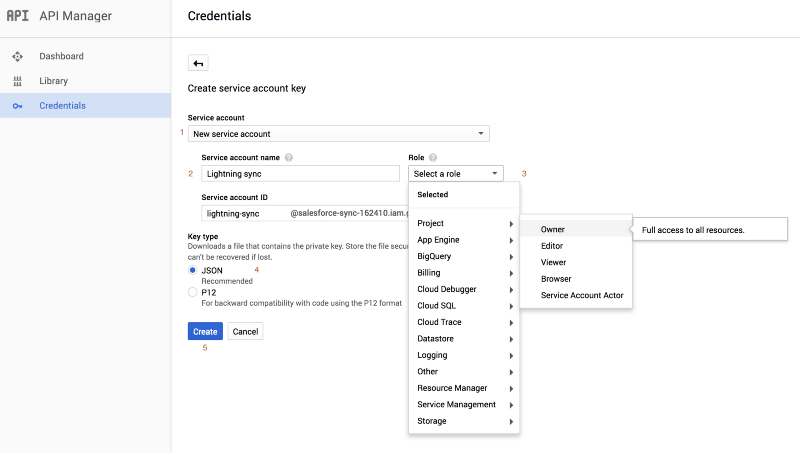
The next screen allows you to choose several options when creating a new Service Account key :
(1)Choose New service account
(2) Name your account
(3) Select Project Owner role from the cascade drop list
(4) Choose to generate a JSON key type
(5) Generate the JSON key ans make sure to save it locally on your computer
When done, you now need to complete a few more steps to grant your project access to G suite for your whole company.
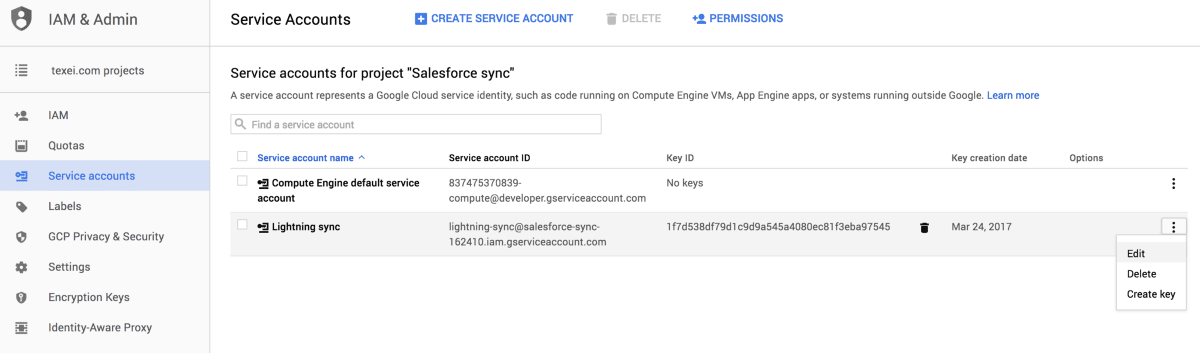
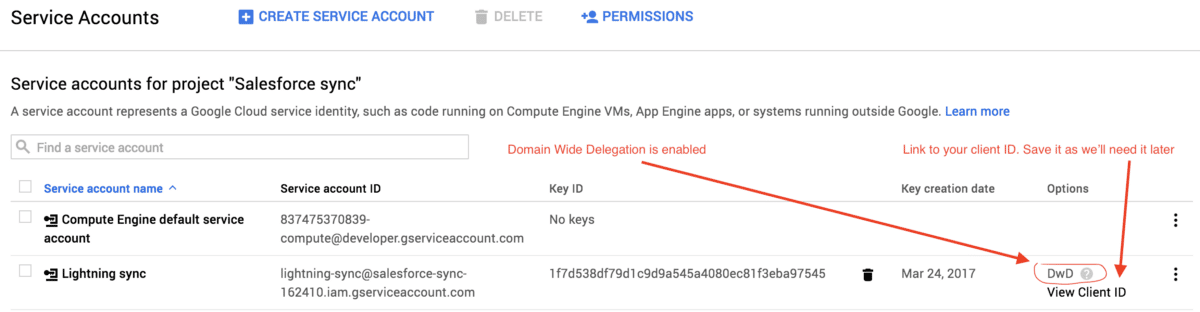
From the credentials screen, you can know access the newly created service account key.
Click on the Manage service account : link on the right top corner of the service accounts list.
It leads to your project IAM & Admin console where you need to Edit your Service Account properties
Click Edit from the “3 dots” button linked to your Service account to edit properties
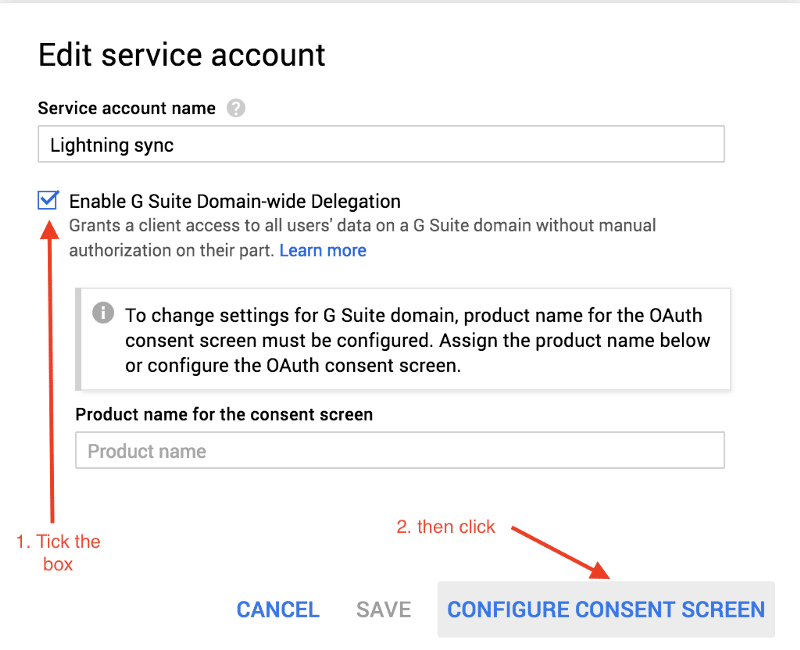
On the consent screen, make sure to select your current company email address and fill in the Product name shown to users field with a meaningful name. You can leave the others fields blank as they are optional. When you’re done, save your Service Account Edit page.
Congratulation, your Service Account is now created ! Be sure to copy your Client ID as we’ll need it later.
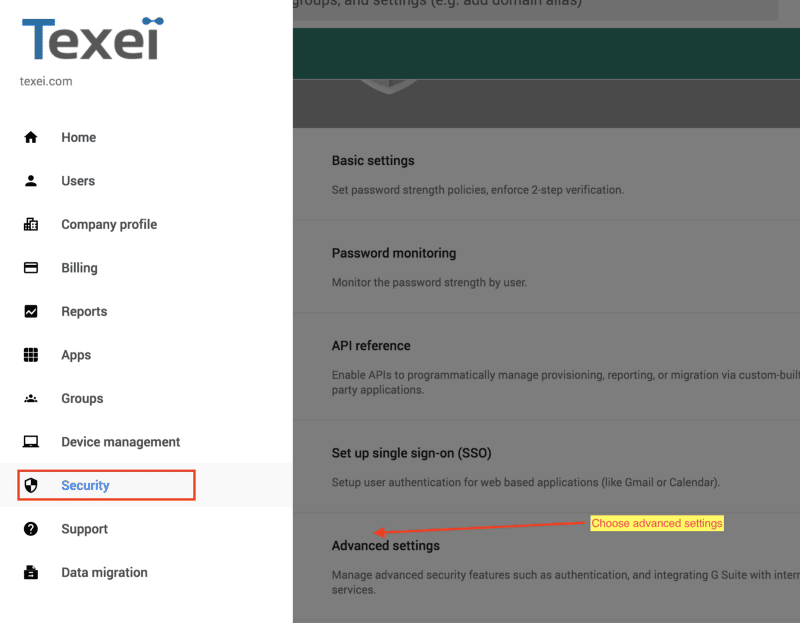
3. From Google for work console
Navigate to Security / Advanced settings / Manage API Access
When you’re in, from the Manage API client access, you can add an entry to authorize your client.
(1) In Client Name enter the Service Account Client ID you previously copied at the end of step 2
(2) In API Scopes, enter these URLs, separated by a coma:
https://www.google.com/m8/feeds
https://www.googleapis.com/auth/calendar.readonly
https://www.googleapis.com/auth/contacts.readonly
(3) Authorize your Client to access these APIs

For official Salesforce’s information about these APIs, please see this help page, section 2 / c.
4. Back to Salesforce Setup to (finally) configure Lightning Sync for Gmail
First, make sure you properly enabled Lightning Sync feature and chose the right authentification method -> OAuth 2.0 for Google
Next, you’ll have to import the JSON key file you generated in step 2.
Before testing your connection, you’ll need to wait for a couple of minutes (2 to 5 generally)
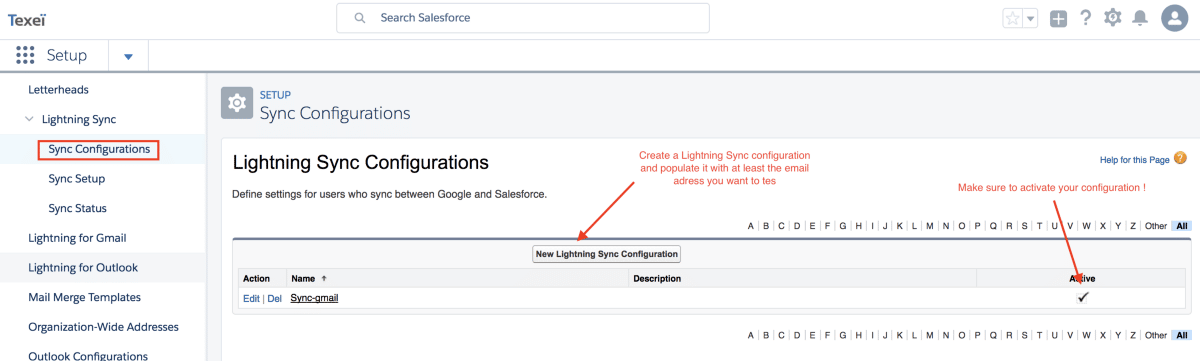
In addition, you’ll need to configure a new user (or group) in order to test your Google to Salesforce connection. Make sure to activate your configuration when done.
This basic configuration is easily done through the Sync Configuration menu. It provides a step by step menu to provision a new user and choose the data set you want to synchronise.
5. Test your connection
This can be done either in Sync Setup or Sync Status. Just enter the user’s email adress you want to test. If successful (and it should be the case), you’ll be notified.

Finally, enjoy your google calendar right into Salesforce !
For the contacts synchronisation, note that a new Salesforce Sync group has been added to your Google contact account.
Any questions or suggestions ? Fell free to leave a comment !